Replacing the Front Porch Columns

Replacing the Front Porch Columns

There’s a lot of plastic on our house.  Vinyl siding, railings, mouldings…none of it was maintained particularly well, so we’ll be replacing it over time with things like wood and metal.  This is the only picture I can find of the railing on our house before Katie and I got frustrated with it and I kicked it down:

That picture doesn’t really let you appreciate how much of the railing was being supported with pieces of brick and other detritus wedged under the bottom rail.  After we demolished it, we were left with this:

Much better!  Except that demolition revealed that the reason the railing wasn’t attached to the columns was large amounts of wood rot.  Every time it rained, the hollow rails would collect with water and hold it against the wooden posts, so once the paint on the columns deteriorated, that was pretty much it.  Water almost always beats wood.  We couldn’t find any premade columns that we really liked, and we kind of liked the idea of doing something custom anyway, so we bought a bottle jack from Harbor Freight for $30 and went to town.

Hollow columns would probably have supported the roof with no problem, but we're us so we used pressure-treated 6x6s.
We used a circular saw to cut around all 4 edges of the column and then finished off the middle with the reciprocating saw.
We used a 2x4 to raise the roof, moved the old column around until it came out, and then replaced it with our new posts.
First column is in place.  We could breathe again.
First column is in place. We could breathe again.
All secured in.  These are resting on aluminum baseplates, so rust and decay shouldn't be an issue.
All secured in. These are resting on aluminum baseplates, so rust and decay shouldn't be an issue.
Once we had done a couple, I felt secure enough to step away and get a picture of the T in use.
All done!  No cave-ins, and the house is still standing!
All done! No cave-ins, and the house is still standing!
More treated wood and some PVC to pretty everything up.
Lots of glue, lots of nails.
Apparently, not enough glue or nails.  This only took a week or so to warp.
Apparently, not enough glue or nails. This only took a week or so to warp.
This time I used more glue and screws.
More better.
More better.
A little mitered box for the top of the bottom wrap.
Starting on the bottom moulding.  So many miter cuts.
Starting on the bottom moulding. So many miter cuts.
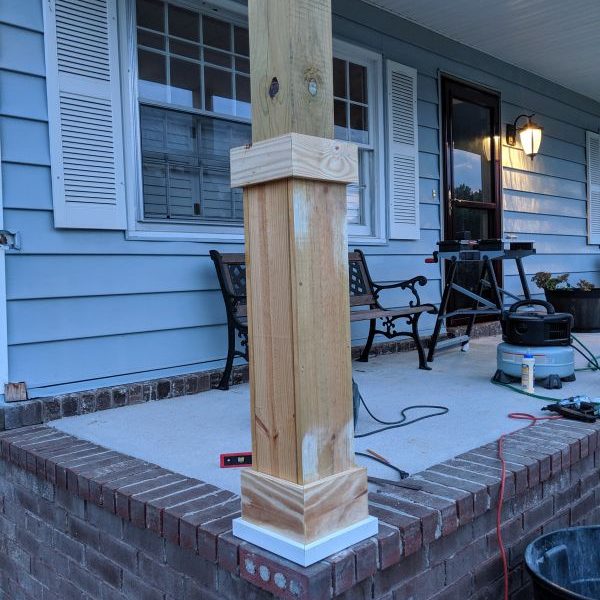
The very bottom is PVC, so it can get as wet as it wants and it'll never rot.
Making progress.  On to the tops!
Making progress. On to the tops!
Step one.
Step one.
Step two.
Step two.
As soon as I finished the last capital, it started pouring rain.  Break time!
As soon as I finished the last capital, it started pouring rain. Break time!
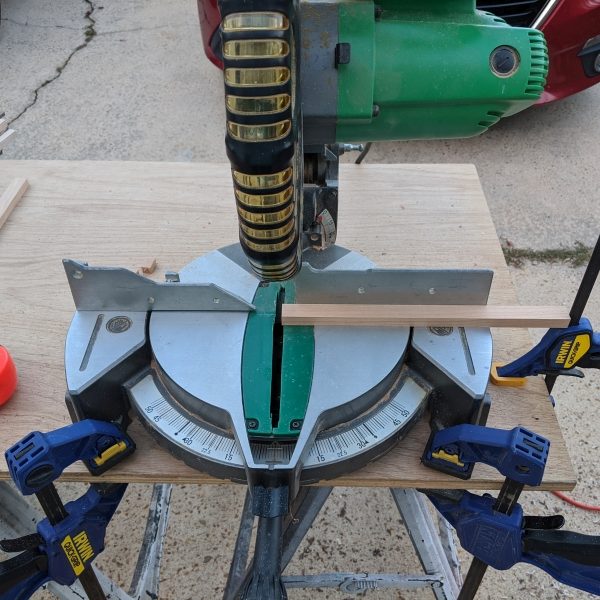
Mitering some more boards for the last component of the column wraps.
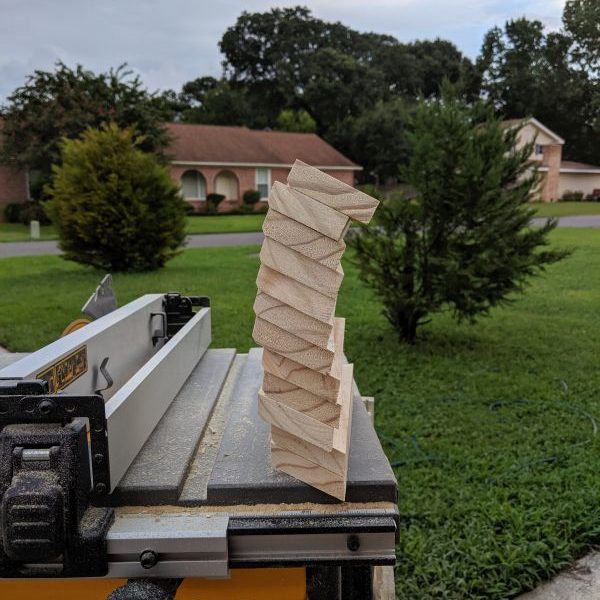
I ran all of these through the table saw to bevel the tops just enough for rain to run off and not collect.
It's hard to see the slope on the individual boards, but it adds up quickly when you stack them.
Finally done.
Finally done.
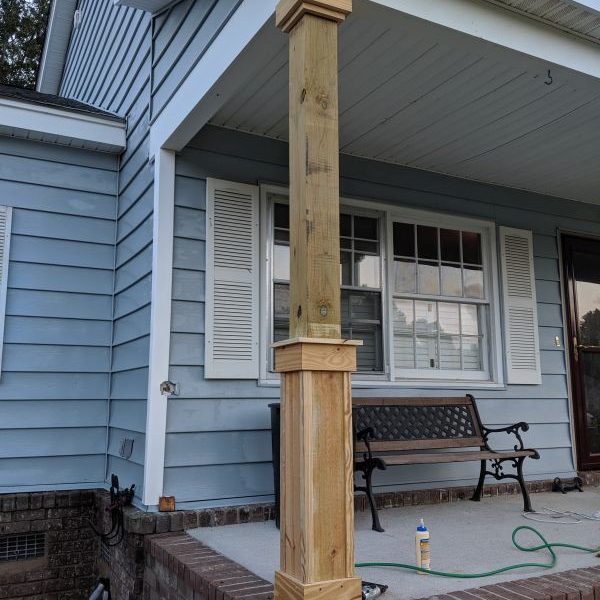
The finished product.  Time for caulk and paint!
The finished product. Time for caulk and paint!
Caulking and puttying took foreeeeeever.
I wanted to just leave them like this, but Katie said no.
All primed up and ready to paint!

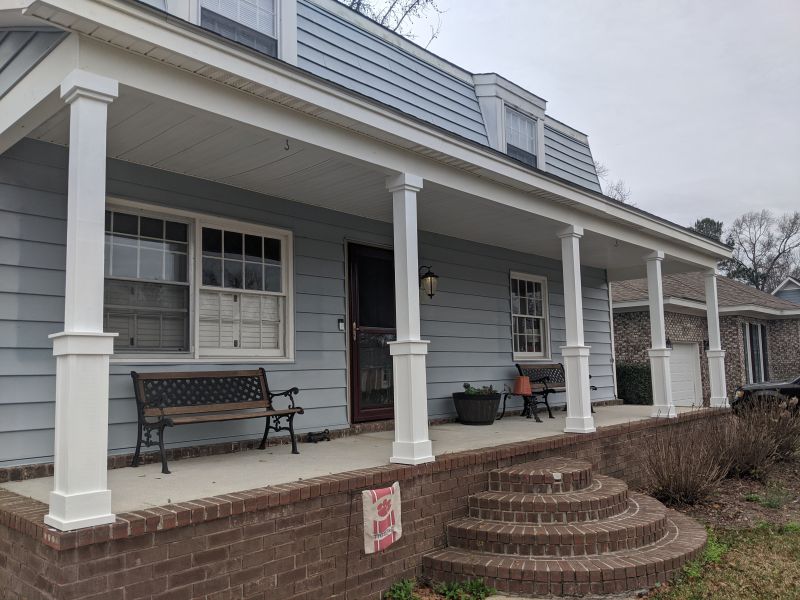
After a couple coats of paint, we were all finished.  File this one under “things we didn’t think we could do, but did anyway.”
Renovation Break: Cutting Boards

Renovation Break: Cutting Boards

Ever since I got a planer for Christmas, I’ve been wanting to make some cutting boards.  What better way to learn than to give yourself a hard deadline, and to make exactly the number you need so that you can’t screw anything up?  Luckily, they came out pretty well:

Berlin G. Myers in Summerville sells these little bundles of different species of wood.  I'm using figured maple, cherry, and walnut.
Berlin G. Myers in Summerville sells these little bundles of different species of wood. I'm using figured maple, cherry, and walnut.
I've ripped a few strips of wood here.  You can also see the awful little plan I drew.
I've ripped a few strips of wood here. You can also see the awful little plan I drew.
Making sure the proportions of everything look right.
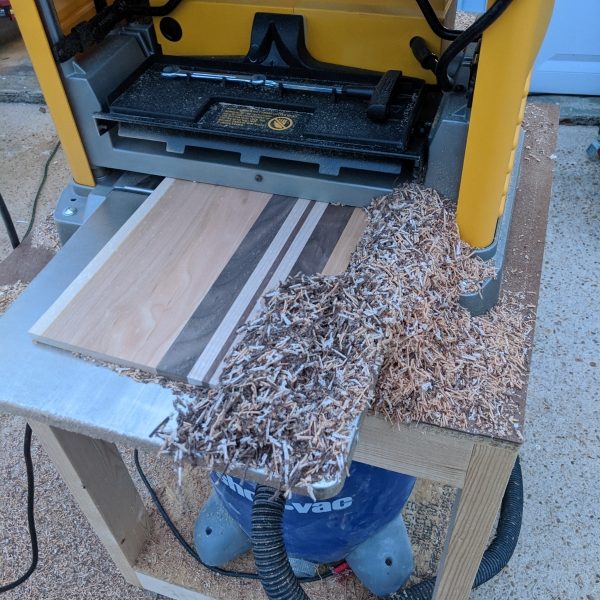
Action shot of the planer chewing up some cherry.
I made a mess.
I made a mess.
I hadn't build my crosscut sled yet, so I rigged up some clamps to act as a stop block.
Glue is on, ready for clamps.  I used Titebond 3 because it's easy to use and food-safe.
Glue is on, ready for clamps. I used Titebond 3 because it's easy to use and food-safe.
Clamped up and wiped off.
All glued up!
All glued up!

At this point I realized that I really needed a crosscut sled to ensure that I was trimming them up square.  I had an extra piece of 2’x4′ 3/4″ luan plywood left over from the upstairs bedroom window bench, some PVC from the front porch columns, and some 2x4s because I always have extra 2x4s from overbuying for other projects, so I put them all together.

Step 1: cut plywood to size
Step 2: lay your runners in the appropriate grooves and use glue to attach them to your plywood
Step 3: overkill fastening the runners to the plywood
Step 4: after attaching the back stiffener, turn the saw on and run the sled through to cut a groove
Step 5: square up your front fence
Step 6: cut!
Step 6: cut!

I’ve got a few things I still want to do to it like adding a safety block behind the front fence so I don’t forget where the blade comes out and installing a stop block-holding mechanism so that I can make uniform cuts, but it’s completely functional now and very square, from what I can tell.  With that side project done, I could finish things up.

After and before a run through the planer.
Making lots of chips.
I was initially going to knock the edges off with a chamfer bit in my router, but I wasn't crazy about the way this looked.
I eventually settled on a 1/8" roundover bit for the edges.
Big sigh of relief here - they're all done and I actually didn't screw anything up!
I used an old soldering iron to sign my work.
My very impressive finishing setup.
I used a classic combo of laxative and beeswax to finish my boards.
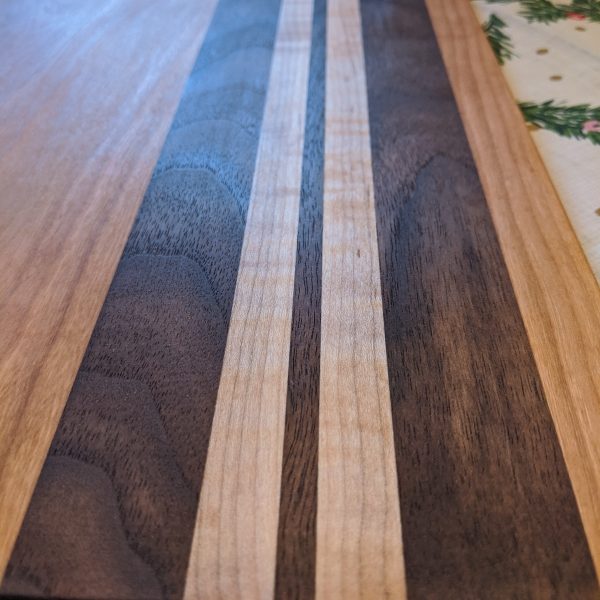
The finish really lights these up.  I was starting to get excited now.
The finish really lights these up. I was starting to get excited now.
IMG_20191224_131423
IMG_20191224_131522
IMG_20191224_131655
IMG_20191224_131549

I was super, super excited with how these turned out.  This was one of the first projects I’ve made that wasn’t just pine and stain, and I’m really looking forward to seeing what I can make with the wood I’ve got left over.  These should last for a really long time as long as they’re not put in the dishwasher and oiled or waxed once in a while.  As much fun as it was to make gifts, now it’s time to get back to renovations…

Upstairs Bathroom: Complete!

Upstairs Bathroom: Complete!

Contrary to popular (mainly Katie’s) belief, I do actually finish a project every now and then.  The upstairs bathroom is included on that elite list.  But before I could scratch it off of the project list, some finishing touches had to be completed:

Walls painted.
Walls painted.
Wallpates installed.
Tron mode activated.
So.  Much.  Tape.
So. Much. Tape.
So.  Much.  Caulk.
So. Much. Caulk.
Just showing off my caulk lines.
Read More

Doo Doo Doo, Knockin’ Down Our Front Door

Doo Doo Doo, Knockin’ Down Our Front Door

Whoever painted our house before we moved in selected a really lovely shade of baby diarrhea brown for the front door.  Naturally, we decided that we’d like to have an entrance to the house that skewed a little less scatological.  In a perfect world, this would involve spritzing a little paint stripper on the door, letting it work its magic, and then scraping everything off to reveal a beautifully-grained slab of wood that could be stained, polyurethaned, and enjoyed for many years to come.

IMG_20180317_134047
IMG_20180317_143016
IMG_20180317_144633
In reality, after fighting with the paint scraper for a while, I discovered that there was another layer of paint under the copro-tastic brown.  I took a knife and scraped some of that to discover another layer of paint, so Plan B was activated: let’s replace the front door!  We’ve done this zero times before, so why not?  After taking a trip to Home Depot, we discovered that the opening for the front door was two inches shorter than a standard opening.  No problem – let’s open up the wall and raise the header!

Read More

Upstairs Bathroom: Tile!

Upstairs Bathroom: Tile!

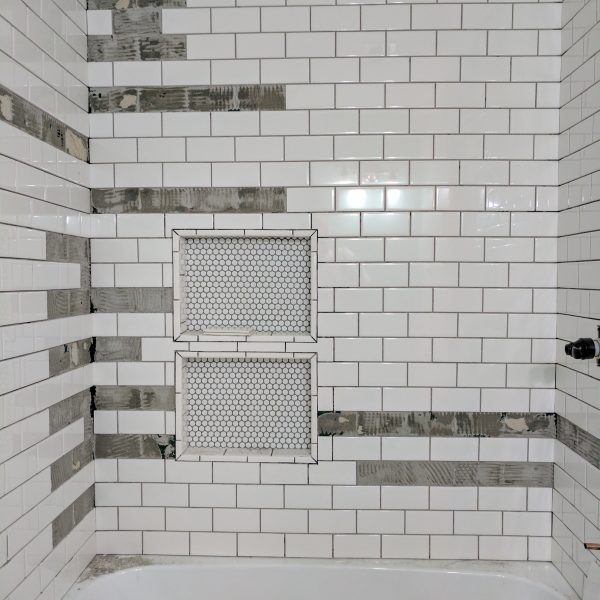
Most people don’t take a year to tile their bathrooms.  Those people aren’t me.  This post is mainly just going to be an image dump, so buckle in!

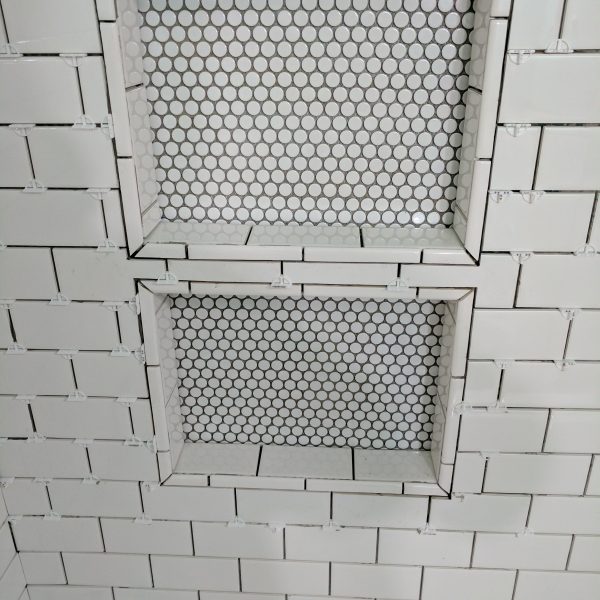
Nobody can ever accuse me of not using enough spacers.
I'm (not) really proud of my tile remnant braces.
I am actually proud of tiling under and behind the vanity, even though it's pretty much completely unnecessary.
Nipping all of the little penny tiles was a NIGHTMARE.
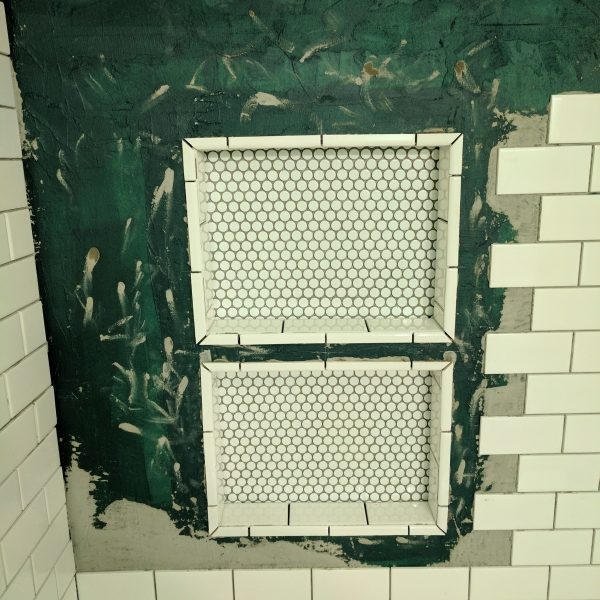
We couldn't find any suitable tiles to trim the nooks out, so we bought some bullnose tiles and I cut most of them off.
Check out the symmetry I've got going on between the top and bottom borders.
All framed out and surrounded.
Lots of tile.
Lots of tile.
The final wall.  I came back and filled in that gap with a tile that I drilled a hole in to accommodate the shower line.
The final wall. I came back and filled in that gap with a tile that I drilled a hole in to accommodate the shower line.
Test fitting the floor tile.  Dreading laying it down.
Test fitting the floor tile. Dreading laying it down.
I'm having flashbacks to nipping all of the edge tiles in half.
Floor is laid!
Floor is laid!
One more row of tiles to go.
And no more rows of tile to go.  FINALLY.
And no more rows of tile to go. FINALLY.
This is when I realized that I didn't like the spacing on some of the tiles, especially in the corners.  You can actually listen to my heart breaking if you turn up your speakers.
This is when I realized that I didn't like the spacing on some of the tiles, especially in the corners. You can actually listen to my heart breaking if you turn up your speakers.
Luckily, it wasn't too hard to fix.
See, I told you.
See, I told you.
You can see the same bullnose tiles I used around the nook here, but this time I used the whole tile.
I am grout!
I am grout!
Wax on...
Wax on...
...wax off.
...wax off.
The grout left this really nifty stain on all of the floor tiles.  I was super excited to find out about that.
The grout left this really nifty stain on all of the floor tiles. I was super excited to find out about that.
Vinegar and a toothbrush took care of it.   Luckily, there were only about 600 tiles to scrub!
Vinegar and a toothbrush took care of it. Luckily, there were only about 600 tiles to scrub!
Almost done!
Almost done!

So endeth the great tiling odyssey of 2016-2017.

Things I learned:

  1. Wipe grout off of matte tile as quickly as possible
  2. Use big tiles
  3. Don’t try to use a wet tile saw indoors
  4. If you’re making a lot of straight cuts, invest in a good tile snap cutter

Next up: caulk, paint, finishing touches, and NOT HAVING TO GO DOWNSTAIRS TO USE THE BATHROOM ANYMORE THANK THE LORD!

Upstairs Bathroom: Demo & Pre-Tile

The week after we moved into the house, I was taking a shower upstairs while Katie was straightening her hair in the bathroom directly under me.  All of a sudden, water started to drip out of the ceiling above her.  Neat.

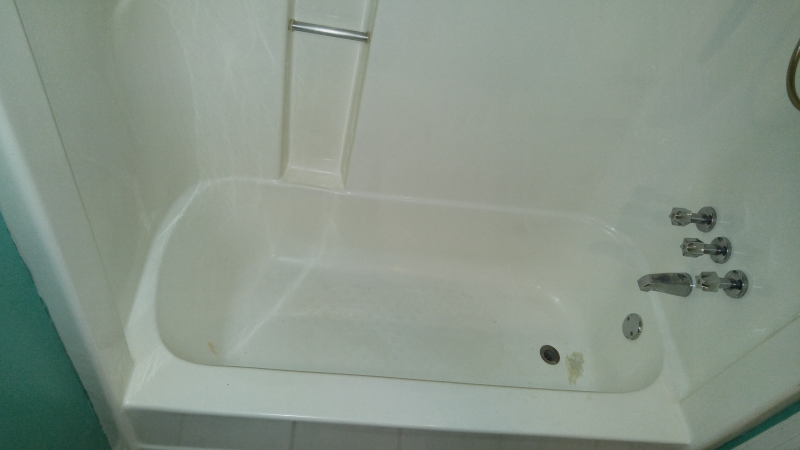
It turns out that the previous owners cracked the bathtub in the upstairs bathroom, and instead of patching it or replacing it like a sane, non-shady person, they just smeared some caulk on it so it would hold water during inspections.  Once we started to use the bathtub, the caulk broke free of the plastic tub, and so water was free to roam the space between the first and second floors.

Read More

Project 1: A Website!

Welcome to Matthew and Katie Against All Y’all!  We bought a fixer-upper in 2016, and we’ve set up this blog so that you can wonder what we were thinking along with us.  Take a look around and let us know what we’re doing right, what we’re doing wrong, and what we should do next!